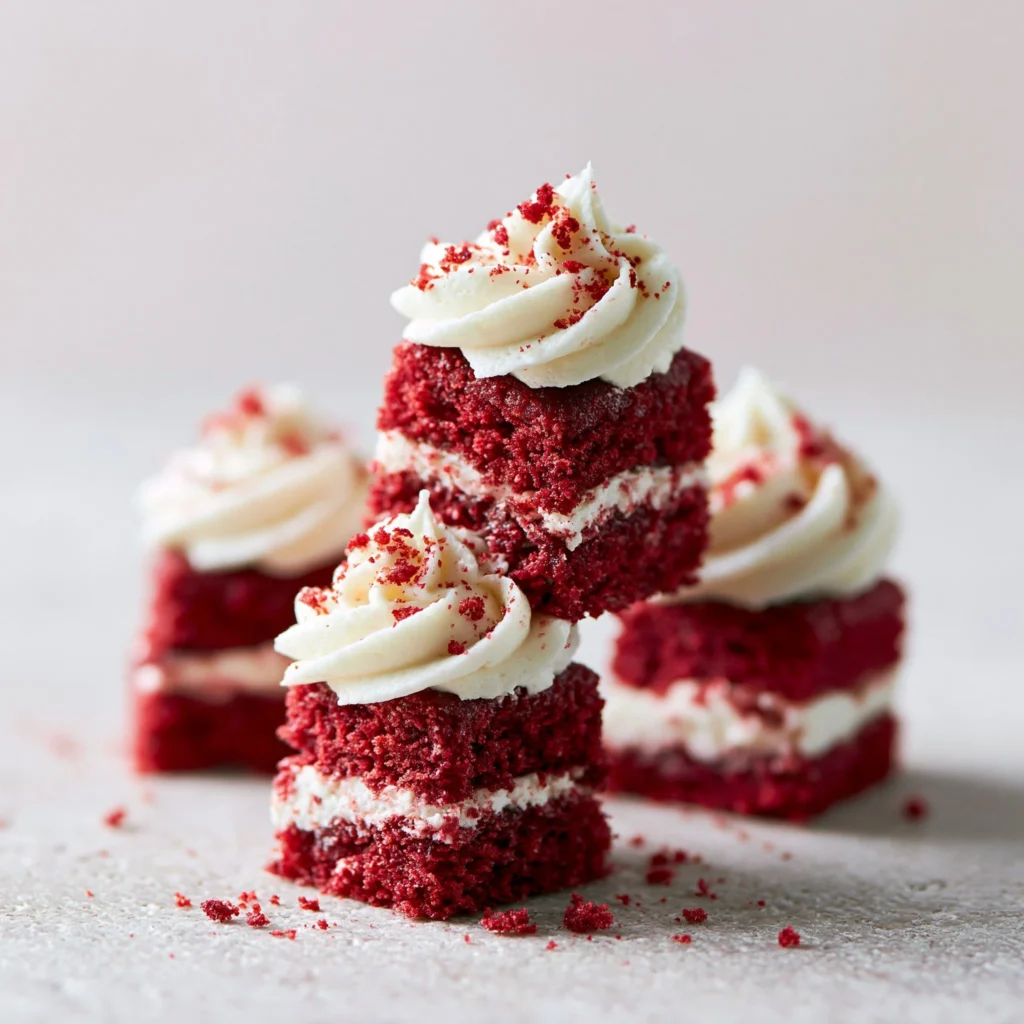
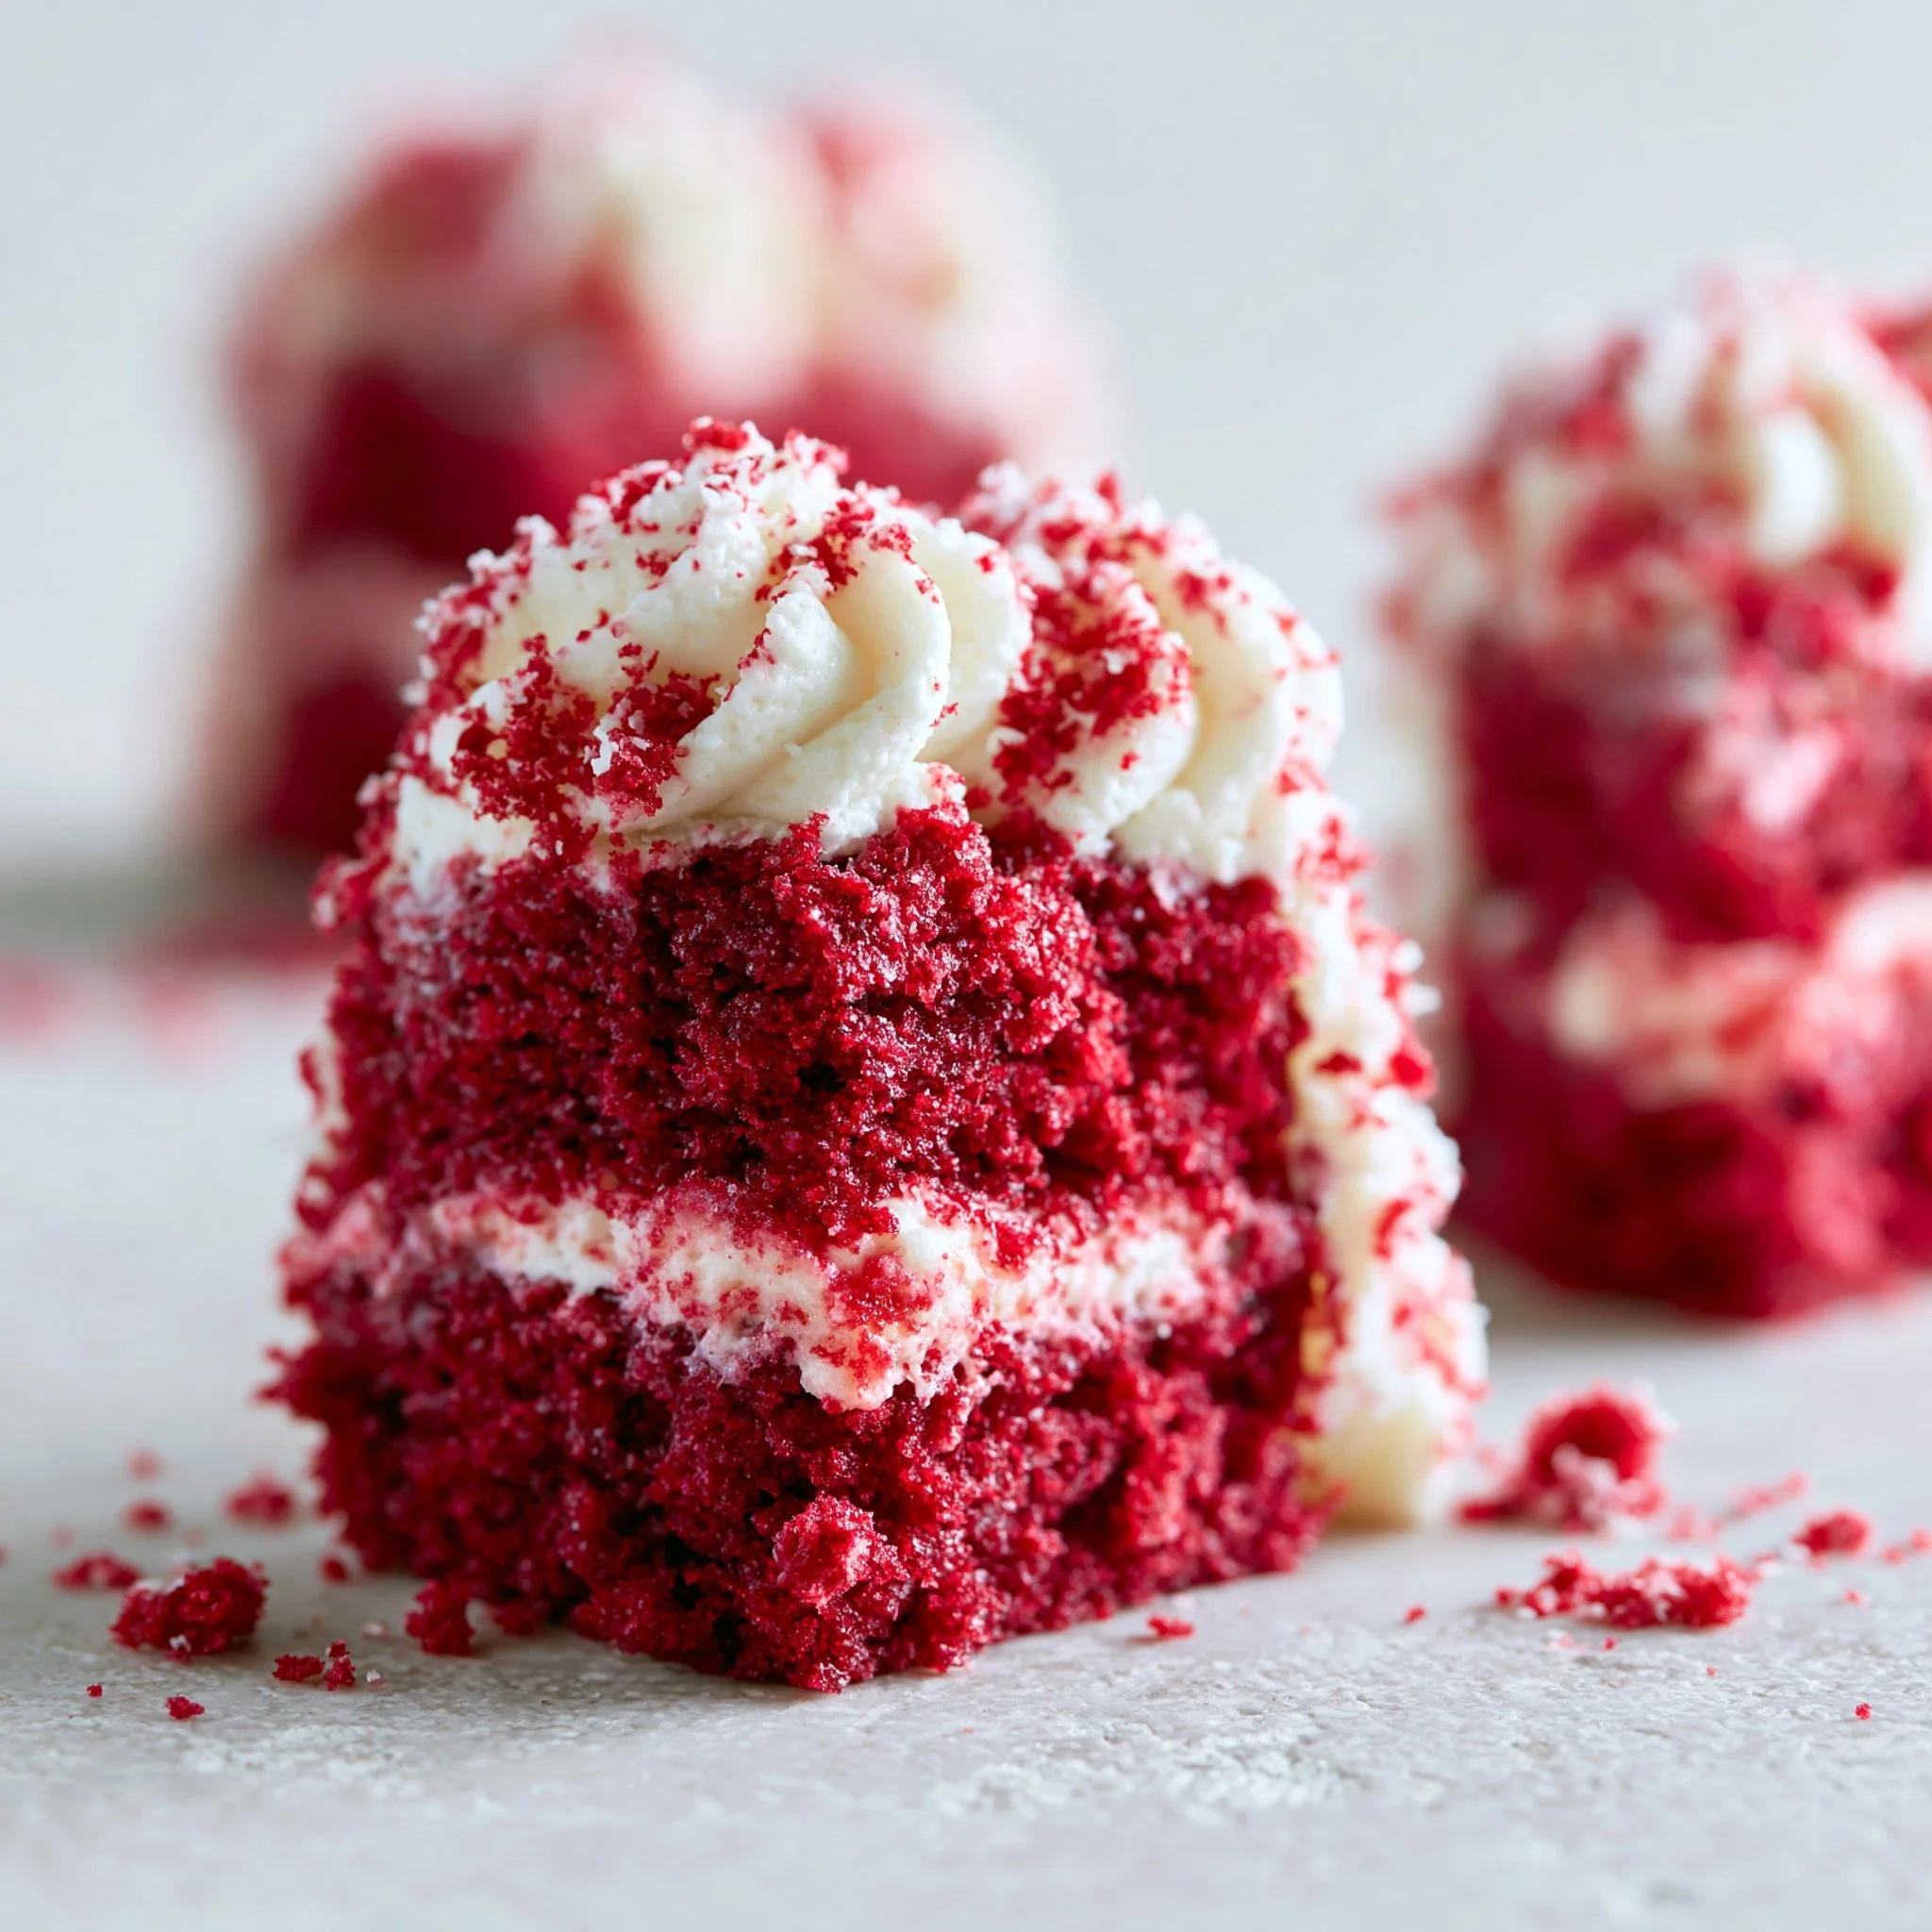
Red velvet in mini form is the kind of baking project that feels fancy, but behaves like a weeknight recipe. These little cakes bake in about 10–12 minutes, come out deeply red with a soft, tender crumb, and they’re just sturdy enough to hold a swoop of tangy cream cheese frosting.
I love serving them when I want a “real cake” moment without committing to slicing and plating. They’re the same vibe as a treat you’d set out beside brunch favorites like 3-ingredient banana oatmeal pancakes—easy, homey, and gone fast.
Why You’ll Love This Recipe
- Quick bake time: Mini muffin tins mean you’re pulling cakes from the oven in 10–12 minutes, not waiting around for layers to bake and cool.
- That classic red velvet flavor: A little unsweetened cocoa powder and plenty of vanilla keep it rich without turning it into chocolate cake.
- Super tender texture: Vegetable oil + buttermilk make a moist, soft crumb that stays plush even after chilling.
- Frosting that’s tangy, not cloying: Cream cheese + butter balances the sweetness of powdered sugar so it tastes like real frosting, not straight sugar.
- Built-in portion control: Each liner is its own serving—no messy slicing, and they’re easy to share.
The Story Behind This Recipe
I developed these when I wanted red velvet with cream cheese frosting—but in a format that didn’t require a cake stand or a crumb coat. A mini muffin tin gives you the full red velvet payoff (bright color, cocoa-vanilla aroma, tangy frosting) in a bite that’s easy to make, easy to transport, and honestly easier to frost neatly than a big cake.
What It Tastes Like
These taste like classic red velvet: lightly cocoa-scented with a clear vanilla sweetness, plus that subtle tang from buttermilk that keeps the crumb from tasting flat. The cakes bake up soft and springy (not dense), and the frosting is creamy and smooth with a gentle cream cheese tang that cuts through the sugar. Together, it’s that perfect contrast—tender cake, fluffy frosting, and a clean finish that makes you reach for a second.
Ingredients You’ll Need
A few ingredients do the heavy lifting here. Buttermilk gives the batter a gentle tang and helps keep the minis tender, while oil keeps them moist (even after they’ve been in the fridge). Cocoa powder is subtle—just enough to deepen the flavor and color. For the frosting, make sure your cream cheese and butter are softened so they whip up silky instead of lumpy. If you don’t have buttermilk, you can still make these, but the flavor won’t have that signature red velvet “edge.”
- 1 cup all-purpose flour
- 1 cup granulated sugar
- 1/2 cup vegetable oil
- 1/2 cup buttermilk
- 1 large egg
- 2 tablespoons unsweetened cocoa powder
- 1 teaspoon baking soda
- 1/2 teaspoon salt
- 1 tablespoon red food coloring
- 1 teaspoon vanilla extract
- 4 ounces cream cheese, softened
- 1/2 cup unsalted butter, softened
- 2 cups powdered sugar
- 1 teaspoon vanilla extract
How to Make Red Velvet Cake Minis
- Heat the oven and prep the pan. Preheat to 350°F (175°C). Line a mini muffin tin with paper liners so the cakes lift cleanly and keep their bright red sides neat.
- Whisk the dry ingredients. In a medium bowl, whisk together the flour, granulated sugar, cocoa powder, baking soda, and salt. You’re looking for an even, cocoa-speckled mixture with no obvious clumps.
- Mix the wet ingredients. In a second bowl, whisk the vegetable oil, buttermilk, egg, red food coloring, and vanilla until the liquid looks smooth and uniformly red.
- Combine—gently. Pour the wet mixture into the dry ingredients and mix just until you stop seeing dry streaks of flour. The batter should look glossy and reddish-brown (it bakes up redder). Don’t overmix or the minis can turn a little tough.
- Fill the liners. Divide the batter between cups, filling each about 2/3 full. This gives you a nice rounded top without overflowing.
- Bake. Bake for 10–12 minutes, until the tops look set and a toothpick inserted into the center comes out clean. The cakes should spring back lightly when you tap the top.
- Cool completely. Let the minis cool until there’s no warmth left—if they’re even slightly warm, the frosting will melt and slide.
- Make the cream cheese frosting. Beat the softened cream cheese and softened butter until smooth and creamy. Gradually add the powdered sugar, then beat in the vanilla until fluffy. It should be thick enough to hold soft peaks.
- Frost and serve. Frost the cooled minis however you like—simple swirls or a quick smear both look great. If you’re serving them alongside breakfast, they’re especially fun after a stack of small batch pancakes.
Tips for Best Results
- Soften the cream cheese and butter fully before frosting. If either is cool in the center, you’ll fight little lumps that never quite beat out.
- Stop mixing the batter as soon as it comes together. Red velvet minis stay tender when you keep the mixing gentle and brief.
- Use the 2/3-full fill line as your guardrail. Overfilling turns minis into muffin-top domes that are harder to frost cleanly.
- Trust visual doneness cues, not just time. At 10 minutes, look for tops that are set and springy; at 12 minutes, you’re usually done—any longer can dry them out quickly.
- Cool completely before frosting. This is the difference between a fluffy cap of frosting and a glossy puddle.
Variations and Substitutions
- Food coloring: You can adjust the amount of red food coloring slightly for a deeper or softer red, but keeping it close to 1 tablespoon gives that classic red velvet look.
- Frosting style: If you prefer less frosting per mini, use a thin swipe instead of a tall swirl—the tangy cream cheese flavor still comes through.
- Vanilla: Stick with vanilla extract here; it’s the main aromatic note alongside the cocoa.
How to Serve It
- Serve at cool room temperature for the softest cake texture and the creamiest frosting.
- For a cleaner look on a dessert platter, frost them and let them sit in the fridge for a bit so the frosting firms slightly.
- These are great with coffee or a cold glass of milk—anything that plays nicely with cocoa-vanilla cake and tangy cream cheese frosting. For more brunch-style sweets, you can browse easy pancake ideas or keep a cozy spread with small-batch breakfast recipes.
How to Store It
Because of the cream cheese frosting, store these in an airtight container in the refrigerator. They’re best after they’ve sat out for a few minutes to take the chill off (the cake feels softer and the frosting tastes fuller). If you want to work ahead, you can bake the minis, cool them completely, and frost closer to serving for the freshest-looking tops.

Final Thoughts
If you want red velvet that’s unfussy but still feels special, these minis deliver: tender, cocoa-kissed cake with a bright red crumb and a creamy, tang-forward frosting that makes each bite pop.
Conclusion
If you’re in the mood to compare approaches (and see different mini red velvet styles), I also enjoy reading Red Velvet Cake Minis – Sprinkle Bakes, Super-Moist Mini Red Velvet Cakes – Amycakes Bakes, and Small Batch Red Velvet Cake – Sugar & Sparrow—they’re great for seeing how small tweaks change the look and crumb while keeping that classic red velvet spirit.

Mini Red Velvet Cakes
Ingredients
Method
- Preheat the oven to 350°F (175°C) and line a mini muffin tin with paper liners.
- In a medium bowl, whisk together the flour, granulated sugar, cocoa powder, baking soda, and salt.
- In another bowl, whisk the vegetable oil, buttermilk, egg, red food coloring, and vanilla until smooth.
- Pour the wet ingredients into the dry ingredients and mix until just combined.
- Fill each muffin liner about 2/3 full with the batter.
- Bake for 10-12 minutes, until the tops are set and a toothpick comes out clean.
- Let cool completely before frosting.
- Beat together the softened cream cheese and butter until smooth.
- Gradually add powdered sugar and vanilla, beating until fluffy.
- Frost the cooled cakes as desired.