
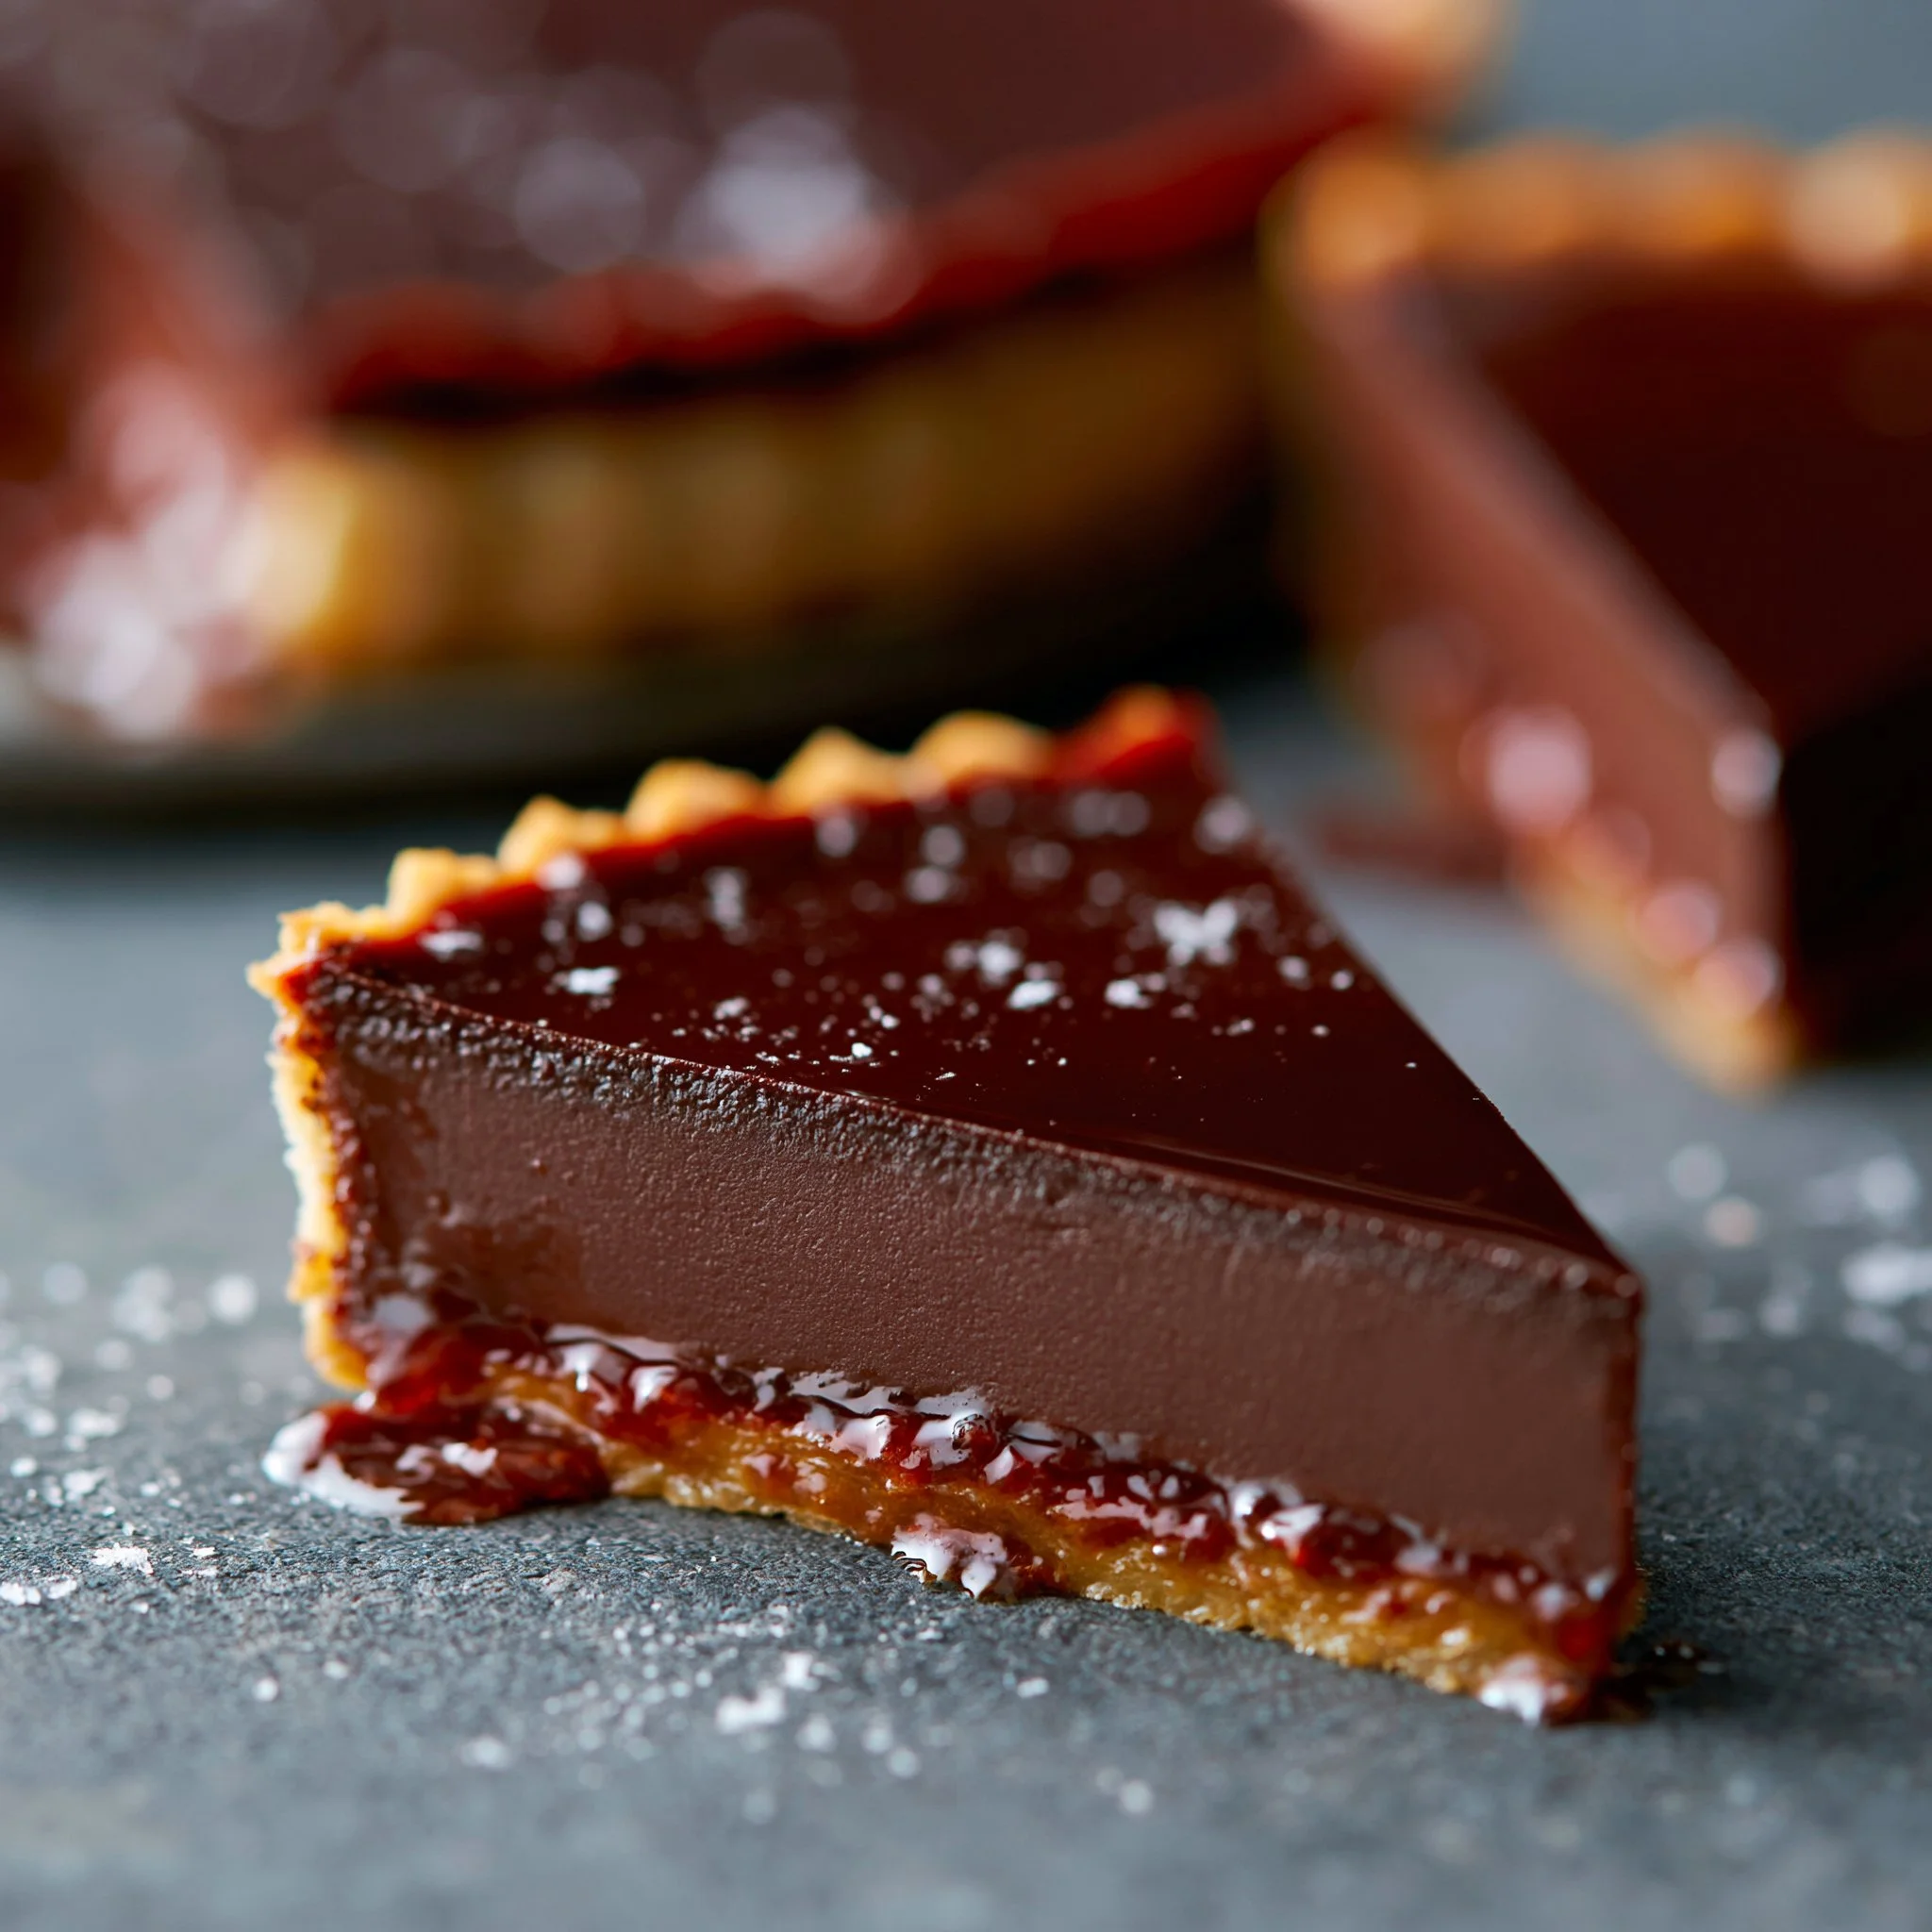
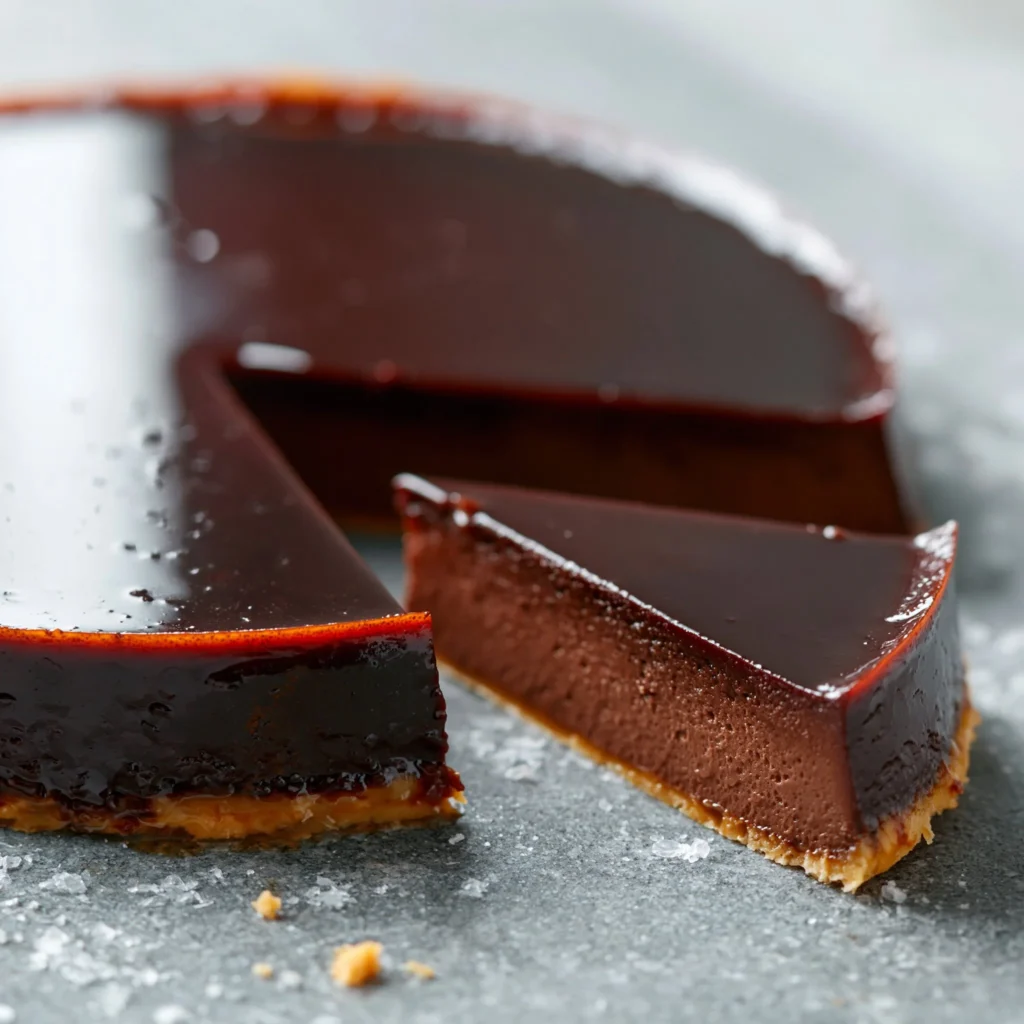
French chocolate flan is what I make when I want a dessert that looks patisserie-polished but feels deeply comforting: a thick, sliceable chocolate custard baked into a tender cocoa tart base. The custard bakes up glossy and dark, with that “just-set” wobble in the center that turns into a silky, fudgy slice after an overnight chill.
If you love rich chocolate desserts but don’t want to fuss with rolling pastry, this one’s for you. The crust is a simple press-and-bake chocolate dough (no chilling, no laminating), and the custard comes together on the stove with a whisk and a little patience. If you’re on a chocolate kick lately, you might also want to peek at my German chocolate cheesecake for another make-ahead showstopper.
Why You’ll Love This Recipe
- That signature texture: the flan sets firm enough to slice cleanly, but stays soft and creamy in the middle—think baked chocolate pudding meets ganache.
- A no-roll tart base: melted butter turns flour, cocoa, and icing sugar into a quick dough you can press out by hand and bake in 10 minutes.
- Deep chocolate flavor (not just sweet): dark chocolate melts into the hot custard for a bold, slightly bitter edge that balances the sugar.
- Make-ahead friendly: the overnight chill is where the magic happens—your slices get neater, darker, and silkier by the next day.
- A glossy finish with one step: warm a spoonful of jam and brush it on for that classic bakery shine (and a faint fruit note that cuts richness).
The Story Behind This Recipe
I developed this version because I wanted the dramatic look of French-style chocolate flan—tall sides, dark custard, crisp-tender cocoa base—without the usual pastry stress. Using melted butter in the tart base keeps it approachable, and cooking the custard until it visibly bubbles gives you a reliable set every time. When I’m baking for chocolate lovers, this lands somewhere between elegant and cozy—like a dressed-up mug of hot chocolate.
What It Tastes Like
It’s richly chocolate-forward with a balanced sweetness, and the aroma when you whisk the chopped dark chocolate into the hot custard is pure brownie-batter heaven. The tart base tastes like a lightly sweet cocoa cookie—tender rather than crunchy—while the flan itself is smooth, thick, and creamy with a gentle jiggle when chilled. That thin jam glaze on top adds a subtle fruity brightness and a beautiful sheen.
Ingredients You’ll Need
Dark chocolate is the main character here—choose one you genuinely like eating, because its flavor comes through in every bite. Cornstarch is what gives the custard its clean slice (without turning it rubbery), and the mix of whole milk + heavy cream keeps the texture plush. For the base, cocoa powder deepens the color and gives you that “chocolate tart” vibe without needing extra steps—similar to the cocoa-rich bite in my chocolate orange shortbread.
For the Chocolate Custard:
- 3 egg yolks
- 2 whole eggs
- 1 cup (200g) white sugar
- ⅓ cup (42g) cornstarch
- ½ teaspoon salt
- 2 ½ cups (600ml) whole milk
- 1 ¾ cups (400ml) heavy cream
- 7 oz (200g) dark chocolate, chopped
- 1 tablespoon jam (for brushing on top)
For the Chocolate Tart Base:
- 1 cup (120g) all-purpose flour
- ⅓ cup (35g) icing sugar
- ¼ cup (25g) cocoa powder
- ¼ teaspoon salt
- 1 stick (114g) butter, melted
- ½ teaspoon vanilla extract
How to Make French Chocolate Flan
-
Prep your pan setup.
Preheat the oven to 350°F (180°C) and line a baking sheet with parchment paper. Have your pastry ring ready—this recipe uses it like a cutter and then as the mold. -
Mix the chocolate tart base.
In a bowl, combine the flour, icing sugar, cocoa powder, and salt. Add the melted butter and vanilla, then mix until you get a smooth, thick paste. It should look like a soft, cohesive chocolate dough—not dry or crumbly. -
Knead briefly, then shape.
Knead the dough just 3–4 turns to bring it together. (Overworking can make it tough.) Flatten into a large circle slightly bigger than your pastry ring—hands work great here, and rough edges are fine since you’ll trim later. -
Bake the base.
Bake for 10 minutes, until the top looks dry and set. It won’t feel crisp like a cookie, but it should no longer look wet. -
Cut the base with the ring (important timing).
As soon as it comes out of the oven, immediately press the pastry ring straight down into the warm pastry like a giant cookie cutter. Do not remove the ring. This is how you get that clean, bakery-style edge. Let it cool with the ring in place. -
Whisk the eggs and sugar.
In a bowl, whisk the egg yolks, whole eggs, and sugar for about 30 seconds until the mixture looks slightly lighter and smoother. -
Add cornstarch and salt.
Whisk in the cornstarch and salt until completely smooth—no dry pockets. This is your insurance policy against lumps later. -
Heat the milk and cream, then temper.
In a large saucepan, heat the milk and heavy cream over medium heat until you see steam rising (not a hard boil). Slowly whisk a small amount of the hot mixture into the eggs to temper, then keep adding gradually while whisking constantly. Take your time here—this is how you avoid scrambled egg bits. -
Cook the custard until thick and bubbling.
Return everything to the saucepan and reduce heat to medium-low. Whisk continuously. You’ll feel it go from thin to thicker and silkier; once it starts to bubble, cook 1–2 minutes more.
Done cue: it should coat the back of a spoon, and when you draw a finger through it, the line stays clear. -
Strain if needed, then melt in the chocolate.
Remove from the heat. If you see any tiny lumps, strain through a sieve. Add the chopped dark chocolate and whisk until fully melted, glossy, and smooth—the custard will turn a deep, dark brown. -
Assemble in the ring.
With the pastry ring still on the cooled base, trim away any excess pastry around the outside. Lightly grease the inside of the ring with butter. Pour in the chocolate custard and smooth the top with a palette knife. -
Bake the flan.
Bake for 50–60 minutes. The edges should look set and slightly puffed, while the center is still jiggly when you gently nudge the pan. (That wobble is good—overbaking can make it grainy.) -
Cool, then chill overnight.
Cool to room temperature, cover with plastic wrap, and refrigerate overnight. This is when it firms up into that classic flan slice. If you’re planning a dessert table, it pairs nicely with something handheld like cheesecake-stuffed chocolate chip cookies. -
Unmold and glaze.
Remove the flan from the ring. If it sticks, run a sharp knife around the edge or warm the outside briefly to help it release. Melt 1 tablespoon jam in the microwave for 20 seconds, then brush a thin layer over the top for a shiny finish (apricot is traditional; strawberry is also lovely).
Tips for Best Results
- Press the pastry ring in while the base is hot. Waiting even a few minutes can make the pastry crack instead of cutting cleanly.
- Temper slowly—especially at the start. A small splash of hot milk/cream first, whisked in well, keeps the eggs from curdling and helps the custard stay silky.
- Don’t stop whisking once the custard is back on the stove. Cornstarch-thickened custard can catch on the bottom; constant whisking keeps it smooth and glossy.
- Bake for the wobble, not for “totally firm.” The center should still jiggle; it will finish setting as it cools and chills overnight.
- Use the jam glaze sparingly. You want a thin, shiny veil—not a sticky layer—so the chocolate flavor still leads.
Variations and Substitutions
- Jam choice: Apricot is classic, but strawberry works well too. Either way, warm it briefly so it brushes on in a thin, even coat.
- Chocolate intensity: Using a darker chocolate will make the flan taste less sweet and more bittersweet; a milder dark chocolate will give a softer, more cocoa-forward flavor.
How to Serve It
Serve this cold or slightly cool for the cleanest slices and the creamiest texture. I like cutting with a sharp knife and wiping it between slices to keep the edges neat. For a full dessert spread, add something playful and shareable alongside it—my chocolate chip cookie cake is a fun contrast to the flan’s sleek, custardy vibe.
How to Store It
Keep the flan covered in the refrigerator. Because it’s custard-based, it’s happiest chilled, and it slices best straight from the fridge. If you’re glazing with jam, you can brush it on after chilling (right before serving) for the freshest shine, but it also holds up well once glazed.

Final Thoughts
If you’re craving a dessert that’s deeply chocolatey but still clean and elegant on the plate, this French chocolate flan delivers—silky custard, cocoa-kissed base, and that simple jam gloss that makes it look straight from a bakery case.
Conclusion
If you enjoy comparing techniques, I appreciate the approach and visuals in French Chocolate Flan – Bonni Bakery, the classic styling cues in French Chocolate Flan – Paris chez Sharon, and the broader flan inspiration over at Chocolate Flan – Isabel Eats.
French Chocolate Flan
Ingredients
Method
- Preheat the oven to 350°F (180°C) and line a baking sheet with parchment paper. Have your pastry ring ready.
- In a bowl, combine the flour, icing sugar, cocoa powder, and salt for the tart base.
- Add the melted butter and vanilla, then mix until you get a smooth, thick paste.
- Knead the dough briefly and flatten it into a circle larger than your pastry ring.
- Bake the tart base for 10 minutes until dry and set.
- Immediately press the pastry ring into the hot pastry and let it cool.
- In a bowl, whisk the egg yolks, whole eggs, and sugar together.
- Whisk in the cornstarch and salt until smooth.
- In a saucepan, heat the milk and cream until steaming. Slowly add to the egg mixture to temper.
- Return mixture to the saucepan and cook, whisking continuously until thick and bubbling.
- Remove from heat, strain if necessary, and stir in the chopped dark chocolate until melted and smooth.
- Pour the custard into the cooled tart base still in the ring.
- Bake for 50-60 minutes until the edges are set and the center jiggles.
- Let cool to room temperature, cover and refrigerate overnight.
- Remove the ring and glaze with warmed jam before serving.